Follow this guide to get started with Node.js. To do this, you must first purchase a Node.js package as an option on your web hosting.
Step 1: uploading your Node.js app into git
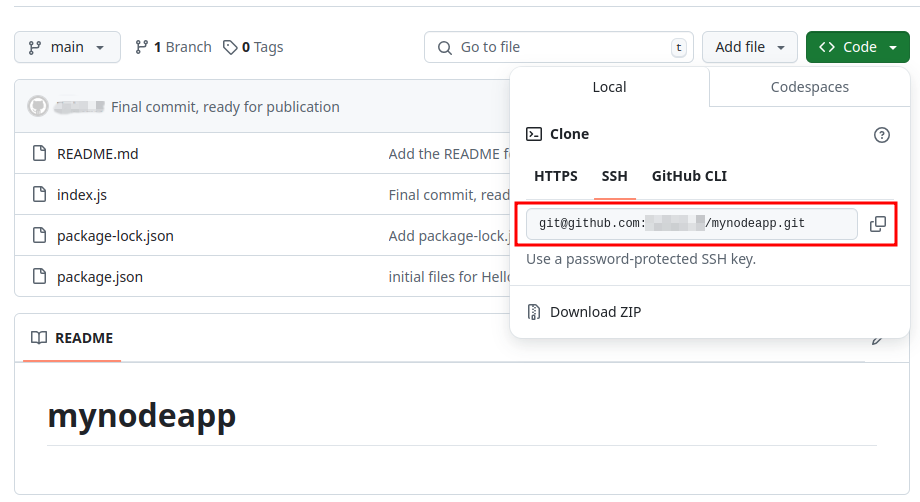
Deploying your Node.js application is done with your code retrieved from an online git repository (e.g. GitHub, GitLab, Bitbucket… ). Therefore, you need to install your application locally first (npm install) and then upload it to a git repository. Copy your respository link (see screenshot) for step 2.
Step 2: add your Node.js instance
After your Node.js application is in a git repository, you need to link it to your Node.js instance at Combell. To do this, add a Node.js instance and link it to your git repository.
To add your Node.js instance, follow these steps in the control panel:
- Go to ‘My Products’ > ‘Web hosting’ and click ‘Manage hosting’ next to your domain name.
- Click on ‘Node.js’ in the menu on the left.
- Click on ‘Add Instance’ on the right.
- Fill in the details of your application: Friendly name, Node.js version and the port on which the application can be reached.
- Check the repository requirements. In the package.json file, a ‘build’ and ‘serve’ script must be present in the ‘scripts’ field anyway.
- Enter your repository link. You can copy it from your git repository like Github.
- Copy the deploy key and click on ‘Add Instance’ to confirm.
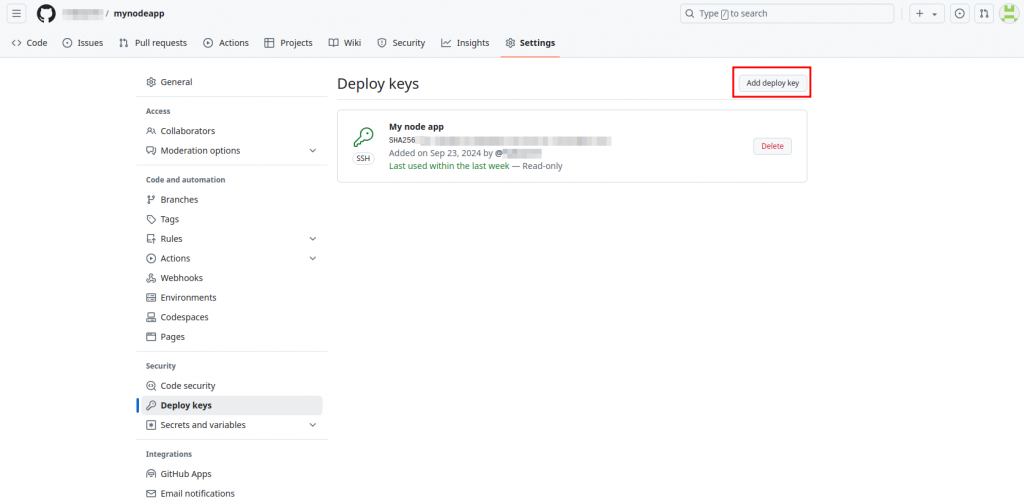
- Now enter the deploy key in your git repository like GitHub, see screenshot. Read-only access is sufficient.
Step 3: running your Node.js pipeline
After creating your instance, we can run the pipeline.
To run your Node.js pipeline, follow these steps in the control panel:
- Go to ‘My Products’ > ‘Web hosting’ and click on ‘Manage hosting’ next to your domain name.
- Click on ‘Node.js’ in the menu on the left and choose your instance.
- Right-click ‘Run pipeline’, see screenshot.
- Your pipeline will now be executed. If it is successful, your application is running. To make it also available online, change the backend of your hosting package, see next step.
Step 4: Make your app available online
If you want your app to also be accessible via the internet, link it to a website on your hosting package.
To make your Node.js application available online, follow these steps in the control panel:
- Go to ‘My Products’ > ‘Web hosting’ and click on ‘Manage hosting’ next to your domain name.
- Click on ‘Websites & SSL’ in the menu on the left.
- Right-click ‘Manage website’ and select ‘Change website backend’.
- Select ‘Node.js’ and choose your Node.js application.
- Click ‘Change website backend’ to confirm. Surf to the website now and you will see the Node.js application.