PayPal is an internationally-known payment gateway that has become a favorite of business owners and customers due to its simplicity, speed and safety. After connecting your credit/debit card to your account with PayPal, you are able to pay for goods and services online with any vendor that offers PayPal as a payment method. The business owner receives the payment instantly after the payment is made.
If you would like to offer PayPal as a payment method for your online store, you must first upgrade your PayPal account to a Business Account. Having the correct type of account is crucial because you will not be able to receive payments for your online store without a PayPal Business account.
Follow these steps to set up your PayPal Business account
- Open PayPal
- Choose Business Account and click Continue.
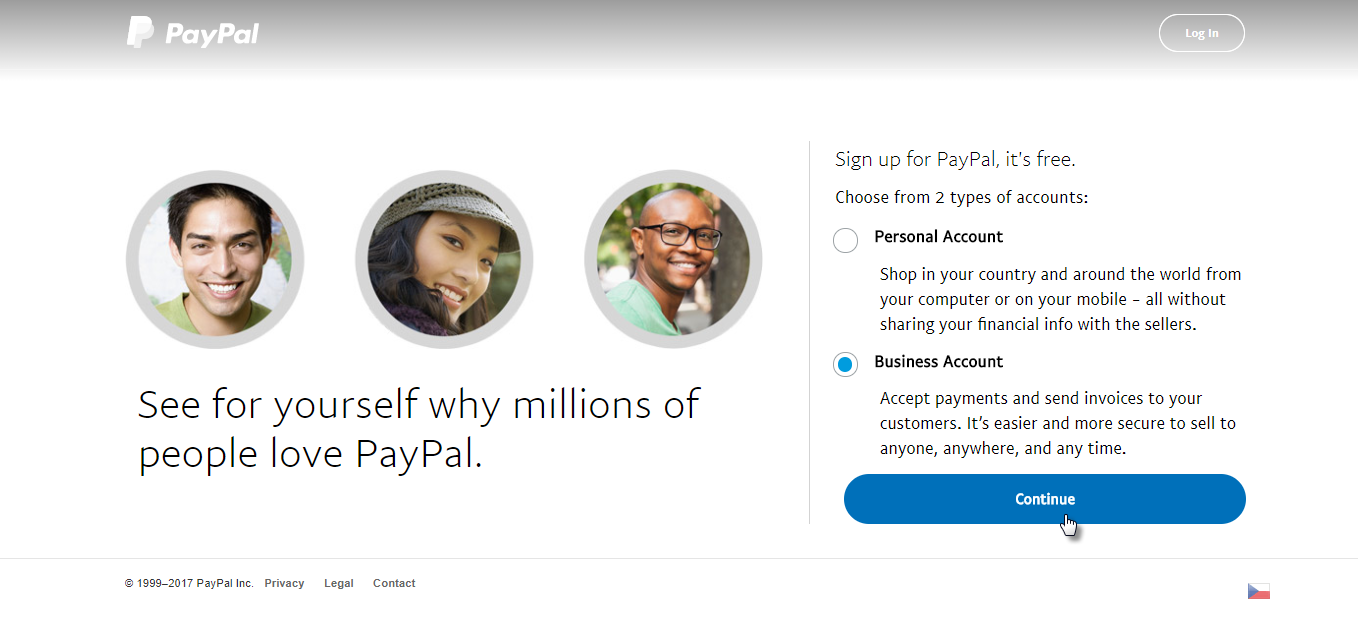
- Enter your email address and click Next.

- Enter the email address and password for your PayPal account and fill in your personal details. Be sure to click the box next to the Terms and Conditions and click Agree and Continue.

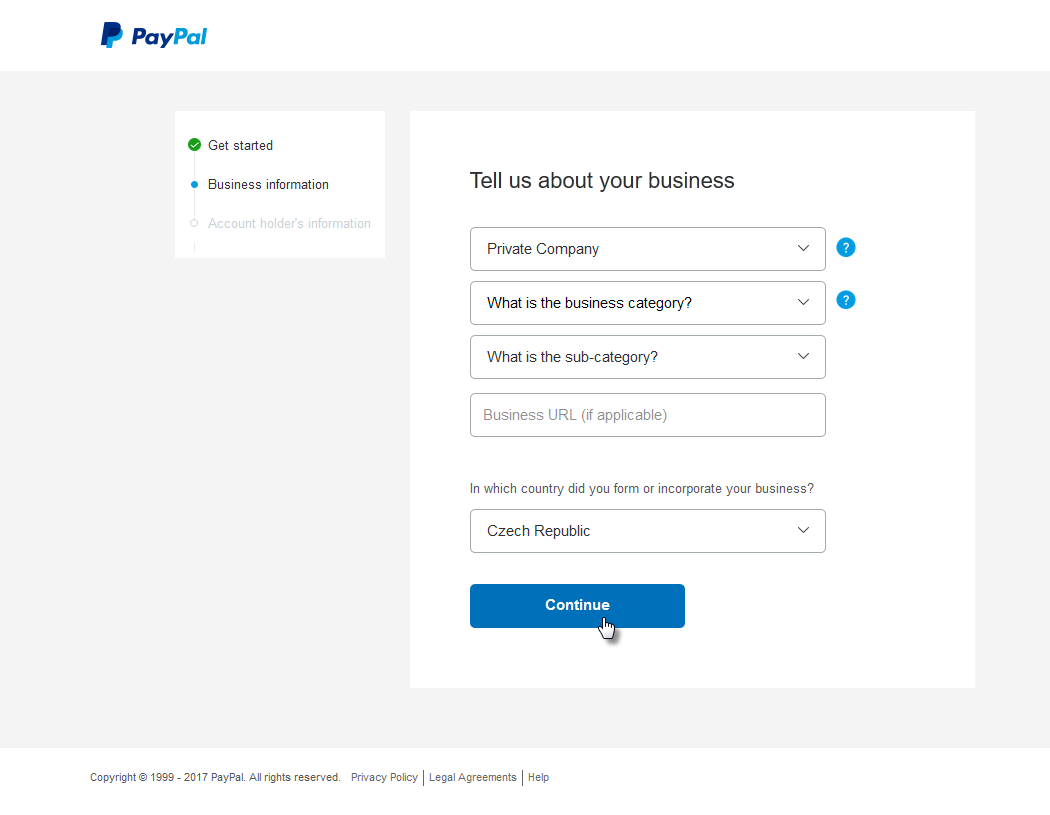
- Choose your type of business.

- Continue entering information as prompted. When finished, click Continue.
- Enter your personal information and click Submit.

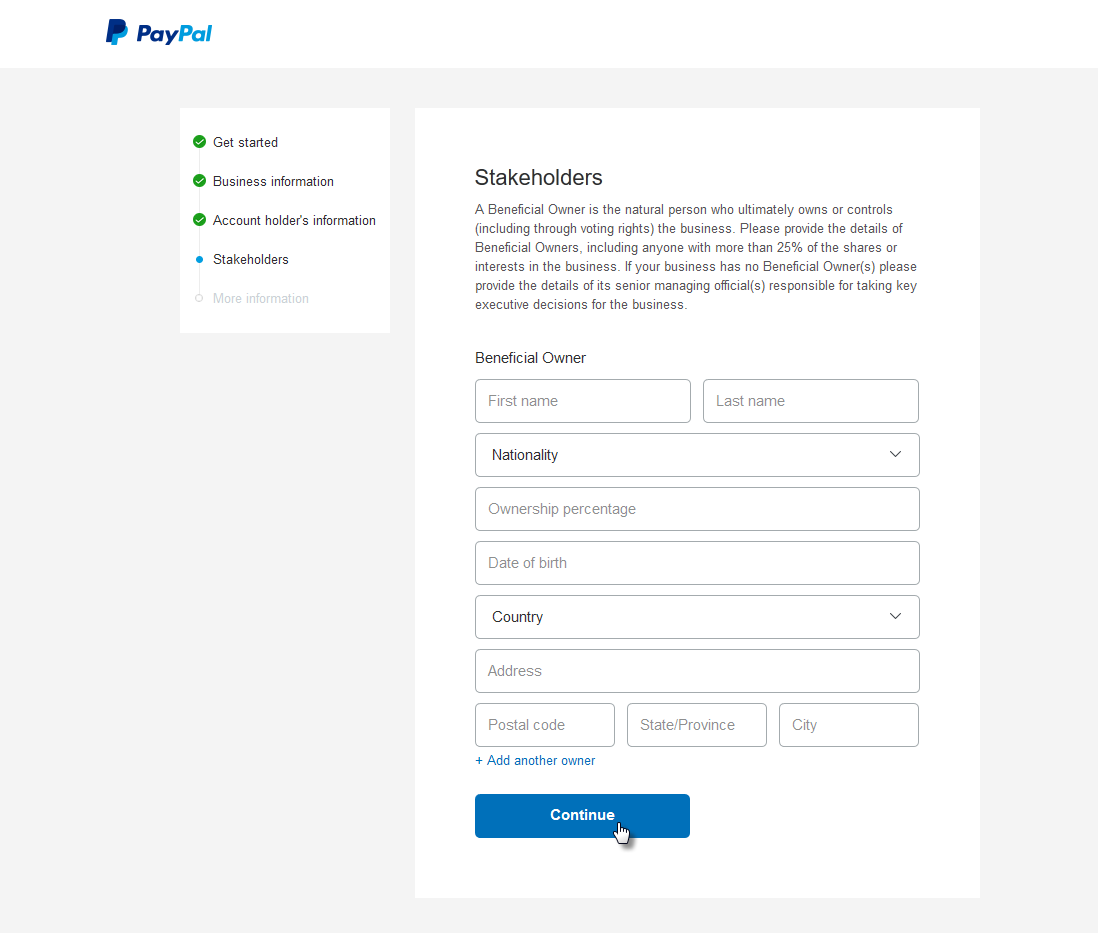
- Enter the information of all stakeholders in your business who own a minimum of 25% of the share of your business. If none exist, enter information for the person who makes the key executive decisions for your business. Click Continue.
- In the next step, answer the questions about whether your business earned 50% or more of its gross income from dividends, interest, rents, royalties or similar sources. Most smaller online stores will most probably choose No. Based on your previous answer, you might have to answer another Yes/No. At the end, click Continue.

Once these steps are complete, your PayPal Business account is created. You must now confirm your email address by clicking on the link in an email received to the email address you entered for your PayPal registration.
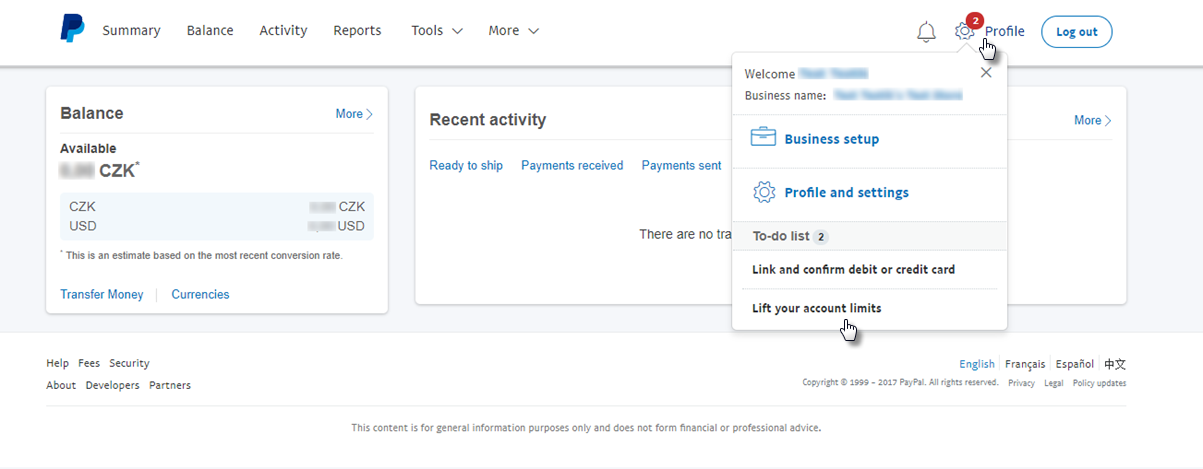
You must now also complete the setup of your PayPal account. To access the settings of your PayPal Business account, click the following link: https://www.paypal.com/activation/businessSetup#account - You have to now connect your credit/debit card to your PayPal account. Click Profile and then Link and confirm debit or credit card.
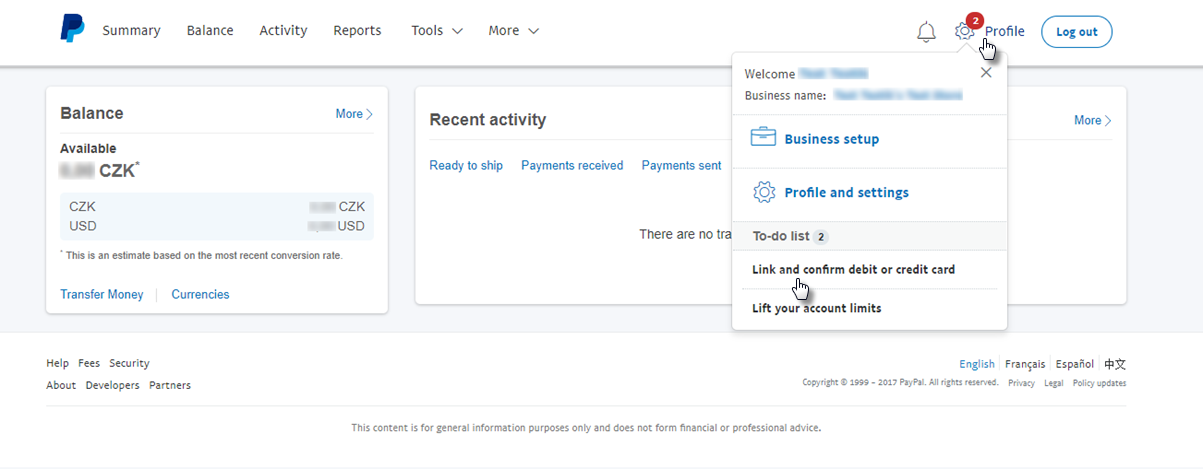
- Enter your credit/debit card’s information and click Continue. PayPal will now attempt to make a payment of a few cents to your account to be sure the account is valid. In the statement of this payment, you’ll find a 4-digit code that you will have to enter in your PayPal account to verify your bank account. The few cents that was deposited into your account will be returned to PayPal within 24 hours after you verify your bank account.
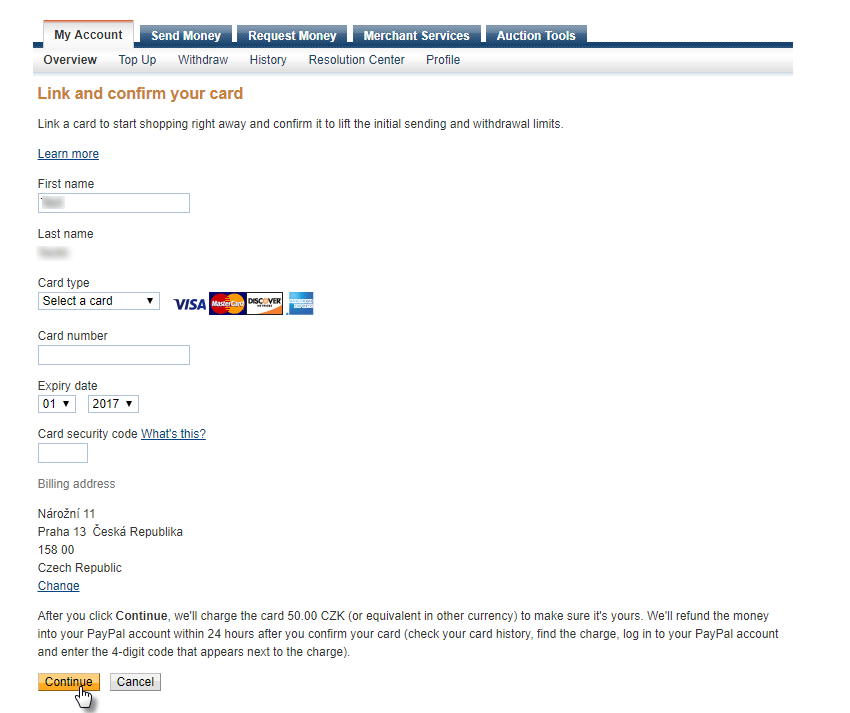
- Once your credit/debit card is verified, you will be able to raise your monthly limits. Click Profile and then Raise your account limits.
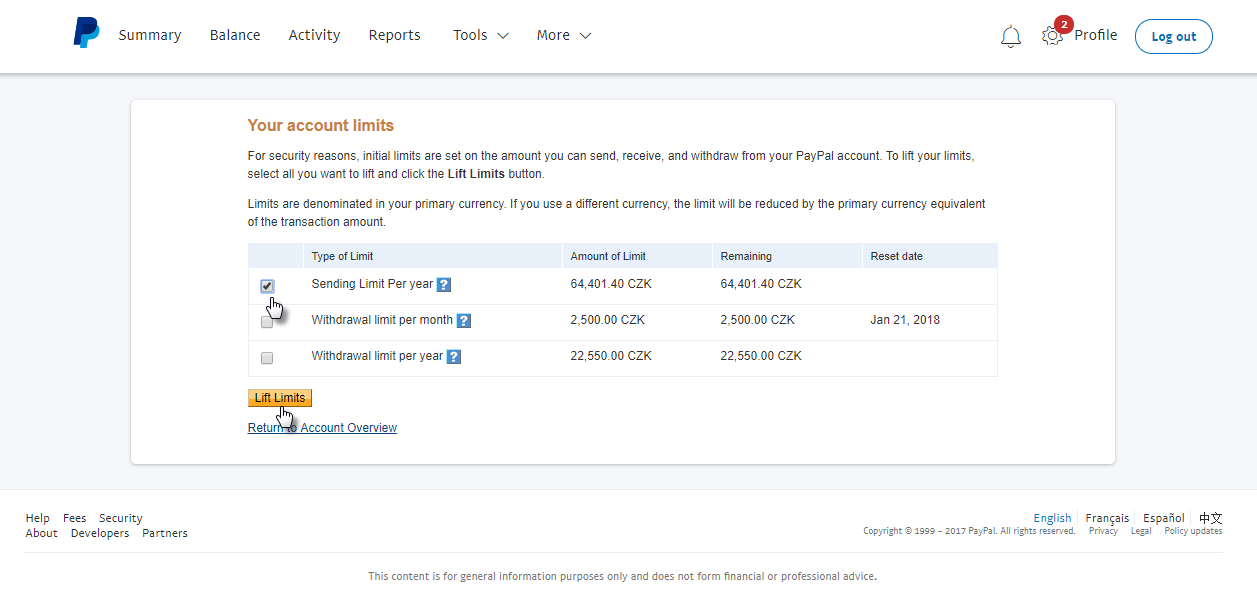
- Choose which limits you would like to raise (limits for sending per year or maximum withdrawals from your PayPal account) and the click Raise limits.
Congrats! Now you are able to add PayPal as a payment method for SiteBuilder.

